


How to decorate original Easter eggs
Not sure how to decorate Easter eggs? This Easter, let your imagination run wild with these fun ideas that we have prepared for you.
TOPIC OF THE MONTH
Share
Easter is one of the most awaited times of the year. Indeed, at the start of it, we can’t wait for a few days off and some free time, something we can finally do during Easter. In addition flying the kite and eating Easter cake (mona de Pascua) which are typical plans for celebrating Easter, one of the most enjoyable activities is decorating Easter eggs. But what is the origin of this tradition?
Easter, in reality, was first celebrated in Rome in around the second century. Hence, it is considered one of the oldest festivals of all. Eggs, on the other hand, have held great symbolism since time immemorial. The Egyptians, for example, buried them in their tombs, and the Greeks also included them in their graves. In the Middle Ages, eggs were painted (especially in colours such as reds, greens and yellows) and were associated with the celebration of Easter. And so, gradually (and with some variations) we reach the present day.
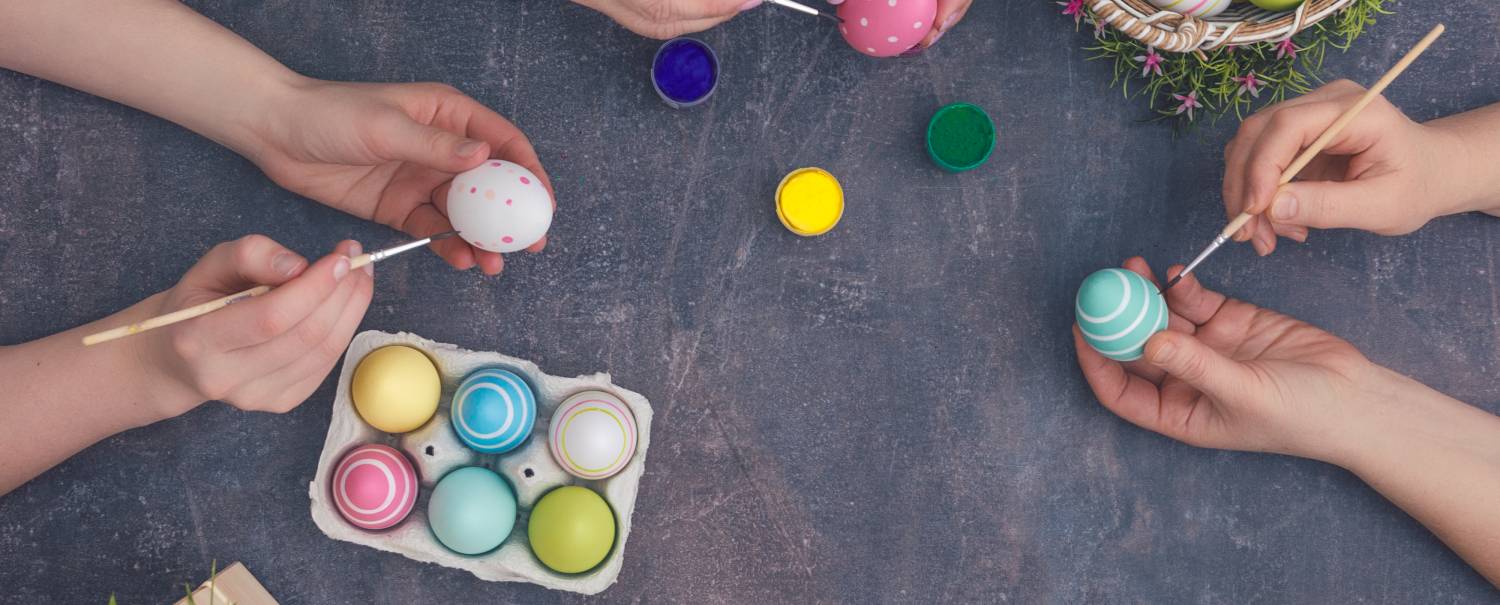
Nowadays, Easter eggs are a classic craft activity, especially for boys and girls who love to paint these foods. There are lots of ideas to decorate Easter eggs and almost for every taste. But, before we get into that, it is important to bear in mind that, in order to capture our creativity in an egg, we have two options: use hard-boiled eggs (more robust) or just use the shell.
In the first case, the method is easy. We just need to get a small pan of water and place it on the hob. When the water is boiling, add the egg (carefully so it doesn't break) and wait for ten minutes. Next, we leave the egg to cool or place it under cold water. If, on the other hand, we want to decorate just the egg shell on its own (recommended if the aim is to leave these foods as décor in the home), we will need to get a pin and make a hole at each end of the egg. Very carefully, let it empty.


Making Easter eggs with easy decorations is no mystery. If we know what colour we want to permeate on the surface, we can even start decorating them when they are boiling. To do so, we can use natural foods such as spinach (green), saffron (yellow) or beetroot (purple) which, boiled together with the egg for at least fifteen minutes, will release their colour.
There are also some funny and charming Easter egg ideas. For example, using single egg cups and coloured paper, we can play with the egg as if it was a head and the egg cup is part of the body. We can draw a moustache and eye patch on the egg, like a pirate, and add a hat; or draw a face and put a pointed Wizard’s hat on it. If the eggs are white (or we paint them white), they can become the perfect canvas for making bunnies or chicks and adding ears or crests to them.
Decorating an Easter egg so it looks like other famous characters is also relatively simple. If we want to make a minion, we will just need to colour half of the egg blue, and the other half yellows (so we will need to immerse it in water dyed with colouring) and, then, stick on some moving eyes and draw on the details. The same is the case with ninja turtles, which we colour green and will stick a ribbon (with glue or hot silicone) and a pair of eyes; or emojis, which will be yellow. On them, we will also draw our preferred faces or expressions.
Materials required for decorating
You can colour Easter eggs with felt tips, with acrylic paint or brushes (especially suitable for a more precise stroke, for example, when drawing floral or tribal motifs. But the creativity doesn’t end there, we can also use other materials to create Easter eggs with easy decorations, like coloured threads or waxes.
If we want to use coloured threads, we just need to put glue on the egg using a brush and embroider around it so each thread sticks to the previous one. On the other hand, to decorate the Easter egg with waxes, we will need them to be very hot (if we are doing this activity with children, we will need to take care they don’t burn themselves). Leave the wax pieces on top of the egg, they will melt and form intricate drawings. These two options are perfect if, in addition, we want to leave the eggs in the house as a timeless ornament.
That said, the only thing we need to do now is get our egg, arm ourselves with craft materials and let our imagination fly!

Nuevo rol del consumidor
Leer más
Nuevo rol del consumidor